If you’ve ever finished a swing and watched your lead elbow flare out like a chicken wing, you already know how frustrating this common fault can be. The chicken wing golf swing happens when the lead arm bends and juts away from the body at impact and follow-through, breaking your arm structure and robbing you of distance. It’s one of the most frequent swing issues among amateur golfers, and it affects both your scorecard and your confidence.
The good news? This fault is completely fixable with the right awareness and practice routine. In this guide, you’ll learn how to recognize the chicken wing, understand what causes it, and use proven drills to build a compact, connected finish that adds power and consistency to every shot.
Spot the Chicken Wing in Your Swing
Before fixing the problem, you need to confirm it’s actually happening. Many golfers play for years without realizing their lead elbow is breaking down at impact.
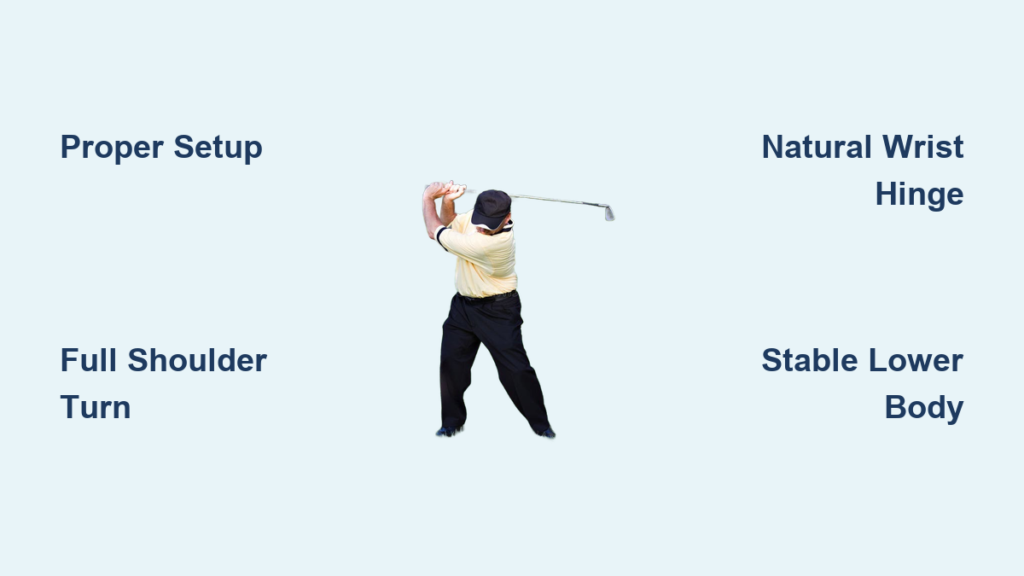
What a Chicken Wing Looks Like at Finish
A proper golf swing finish shows the lead arm extended across the chest with the elbow pointing down and tucked close to the body. A chicken wing swing looks completely different.
Visual signs to watch for:
– Lead elbow bent and pointing outward
– Hands high and separated from the trailing shoulder
– Loss of balance on the finish
– Soreness in the lead elbow or wrist after a round
Record your swing from two angles (down-the-line and face-on) and compare your finish position to professional players. Their arms stay connected and their balance holds firm throughout.
Common Causes of the Chicken Wing Fault
The chicken wing is usually a symptom of earlier mistakes in the swing, not an isolated problem. Identifying the root cause helps you fix it permanently.
Top causes include:
– Overactive arms: Relying on hands and arms for power instead of body rotation
– Poor weight transfer: Staying on the back foot prevents proper hip turn
– Scooping at impact: Trying to lift the ball causes the lead arm to collapse
– Disconnection early in the swing: The lead arm separates from the chest during the backswing or downswing
When these issues happen, the lead arm loses structure at impact, forcing the elbow to flare outward to compensate.
Build a Solid Setup and Grip
Every great swing starts with a stable foundation. Your grip and posture play a major role in preventing the chicken wing before the club even moves.
Get Your Grip in a Neutral Position
An overly strong or weak grip changes how your hands release the club, making a stable lead elbow harder to maintain.
Grip checklist for a neutral hold:
– Lead hand “V” points between trailing shoulder and chin
– Two or three knuckles visible on the lead hand
– Trailing hand mirrors the lead without excess tension
A neutral grip encourages a square clubface at impact and removes the urge to flip the hands.
Align Your Lead Arm and Shoulders at Address
Your lead arm should hang naturally from your lead shoulder at setup, not pulled tight across your chest or pushed too far away.
Setup fundamentals:
– Feet shoulder-width apart
– Knees slightly flexed
– Spine tilted forward from the hips
– Arms relaxed and hanging freely
This athletic stance promotes a full, connected turn without restricting motion.
Shift From Arms to Body Rotation
The biggest fix for the chicken wing is learning to swing with your body instead of your arms. Rotation generates power, while arm swinging creates the breakdown.
Turn Your Hips and Shoulders Together
A proper downswing is led by the lower body, not the arms. When your hips rotate toward the target, your arms stay passive and connected.
Drill: Belt Buckle Turn
– Place a club across your hips and hold the ends
– Practice turning until your belt buckle faces the target
– Feel your hips and shoulders rotate as one unit
This drill trains core engagement and keeps your lead arm in position through impact.
Delay the Release to Stay Connected
Casting the club early breaks your arm structure and forces a chicken wing. Keeping the club connected longer preserves lag and prevents collapse.
Drill: Towel Under the Armpit
– Tuck a small towel under your lead armpit
– Make slow swings keeping the towel in place
– Focus on body rotation, not arm motion
If the towel falls, your arms have separated from your torso. This simple feedback builds proper arm-body connection.
Practice With Chicken Wing Correction Drills
Specific drills retrain muscle patterns and eliminate the habit of flaring the lead elbow.
Wall Drill for Elbow Awareness
This drill physically blocks the elbow from flaring during the swing.
How to perform it:
1. Stand sideways to a wall with your lead side about 6 inches away
2. Make slow backswings and follow-throughs
3. Keep your lead elbow from touching the wall
If your elbow contacts the wall, you’re flaring too much. Over time, this drill trains a compact, connected motion.
One-Handed Lead Arm Swings
Using just your lead hand strengthens the correct release pattern and improves arm structure.
Steps to follow:
– Grip a 7-iron with only your lead hand
– Make slow, controlled swings focusing on a straight lead arm
– Feel the club release naturally without flipping
Start with half-swings and build up speed as your control improves.
Finish Position Hold for Balance
Holding your finish builds muscle memory for a proper end position.
How to do it:
1. Hit a full shot or make a full practice swing
2. Hold the finish for 3 seconds
3. Confirm your lead arm is across your chest with the elbow tucked
A balanced, held finish reinforces correct mechanics and exposes any breakdown.
Strengthen the Muscles That Support Your Fix

Physical conditioning helps you maintain proper form, especially when fatigue sets in during a round.
Build Core Stability
Your core powers the rotation that prevents arm dominance. Weak core muscles force your arms to take over.
Effective exercises:
– Planks: 3 sets of 30 seconds per side
– Russian twists: 3 sets of 20 reps
– Medicine ball rotational throws: 3 sets of 10 per side
A strong core keeps your swing stable and repeatable.
Condition Your Lead Arm and Forearm
The lead arm must stay firm through impact. Strengthening it reduces breakdown.
Try these exercises:
– Wrist curls: 3 sets of 15 reps
– Stress ball squeezes: 3 sets of 20 reps
– Resistance band elbow extensions: 3 sets of 12 reps
Even light training improves arm stability over time.
Avoid These Common Fixing Mistakes
Correcting the chicken wing takes patience. Some golfers make the problem worse by overcorrecting or skipping steps.
Don’t Force Your Elbow In
Trying to tuck the elbow too aggressively creates tension and restricts your swing. The fix should feel natural, not forced.
Better focus: Rotate your hips and let the elbow follow.
Don’t Ignore the Backswing
A flawed backswing sets up the chicken wing on the downswing. If your lead arm breaks down early, it’s nearly impossible to recover.
Quick fix: Keep your lead arm straight and connected during takeaway. Imagine a laser beam shooting from your lead elbow to the ball.
Don’t Rush the Transition
A jerky move from backswing to downswing disrupts timing and forces the arms to compensate. Smooth tempo keeps everything in sync.
Tempo tip: Count “1 – 2 – 3” during your swing to maintain rhythm.
Make the Fix Stick Over Time
Once you’ve corrected your chicken wing, consistent practice keeps it from returning.
Record Your Swing Monthly
Subtle regressions are hard to feel but easy to see on video. Record yourself every few weeks and compare to your earlier swings.
What to track:
– Lead elbow position at finish
– Arm-body connection
– Balance and weight transfer
Warm Up With Connection Drills
Spend 5 to 10 minutes before each round reinforcing proper mechanics.
Suggested warm-up routine:
– 5 minutes of towel-under-arm swings
– 10 one-handed lead arm swings
– 5 full swings with a held finish position
Schedule Periodic Coach Check-Ins
A trained eye catches flaws you might miss. Schedule a swing analysis every few months to stay accountable.
Frequently Asked Questions About the Chicken Wing Golf Swing
What causes a chicken wing in golf?
A chicken wing swing is caused by the lead elbow bending and flaring outward at impact and follow-through. Common causes include overactive hands, poor weight transfer, trying to scoop the ball, and early arm disconnection during the swing.
Can a chicken wing cause golf injuries?
Yes, a chicken wing puts excess stress on the lead elbow, wrist, and shoulder. Over time, this can lead to tendon strain, joint pain, and reduced swing consistency.
How long does it take to fix a chicken wing swing?
Most golfers notice improvements within a few weeks of consistent practice. Full correction usually takes one to three months, depending on how ingrained the habit is and how often you practice the drills.
What is the best drill to fix a chicken wing?
The towel-under-armpit drill is one of the most effective because it promotes arm-body connection and prevents the lead elbow from separating from the torso.
Does grip affect the chicken wing?
Yes, an overly strong or weak grip can change how the hands release the club, increasing the chance of the lead elbow flaring. A neutral grip helps maintain proper arm structure through impact.
Key Takeaways for Fixing Your Chicken Wing Golf Swing
Fixing a chicken wing golf swing comes down to better mechanics and body awareness. Focus on rotating your hips instead of swinging with your arms, keep your lead arm connected through impact, and use drills like the towel-under-armpit and wall drill to build proper habits. With consistency and patience, your finish will look balanced, powerful, and free of that awkward flared elbow. Start with one drill this week and build from there.