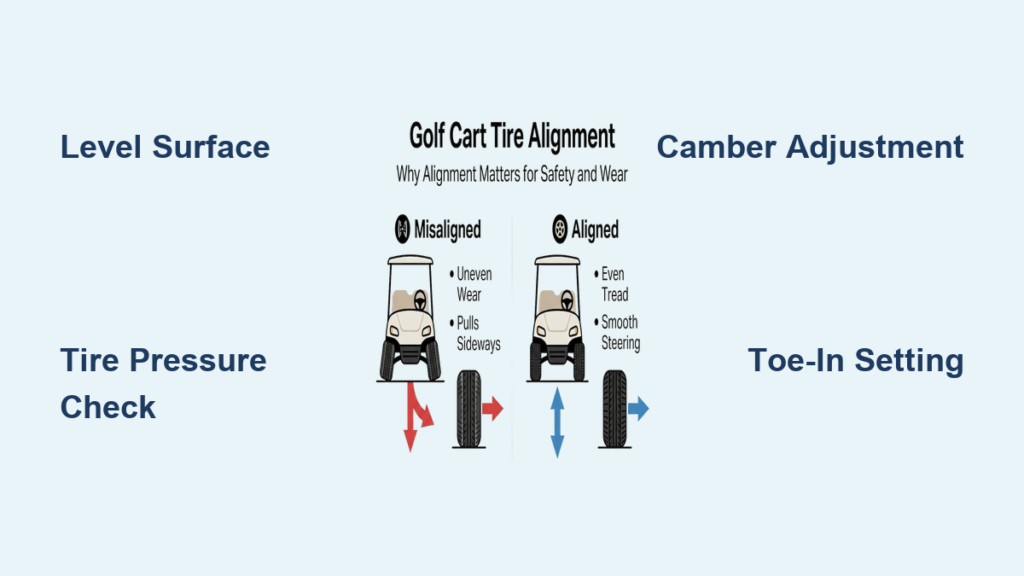
If your golf cart drifts to one side or your front tires wear unevenly, you likely have an alignment problem. Learning how to align a golf cart restores straight tracking, extends tire life, and prevents dangerous handling issues. Misalignment can even trigger a violent front-end shake known as death wobble, especially on lifted models. Beyond safety, poor alignment drains your wallet by cutting tire lifespan in half.
This guide walks you through every step of a proper DIY alignment, from prepping your cart to the final test drive. You’ll learn which method fits your budget, how to adjust camber and toe correctly, and how to avoid the most common mistakes.
Safety and Preparation Essentials
Skipping prep work is the fastest path to a failed alignment. A few minutes upfront saves hours of frustration later.
Work on a Flat Surface
Always align your cart on a flat, level surface. An uneven floor distorts measurements and makes every adjustment useless. Engage the parking brake and block the rear wheels to prevent any rolling.
Check Tire Pressure First
Tire pressure must be equal across all four tires before you measure anything. Uneven inflation skews readings and leads to false adjustments. Inflate or deflate each tire to match the manufacturer’s recommended PSI.
Inspect Suspension Components
Worn ball joints, loose heim joints, or damaged tie rods will cause your alignment to fail almost immediately. Inspect every steering and suspension part. If anything feels loose or shows visible wear, replace it before proceeding.
Pro Tip: A misaligned cart with worn suspension is a hazard waiting to happen. Always fix the foundation first.
Understand Key Alignment Terms
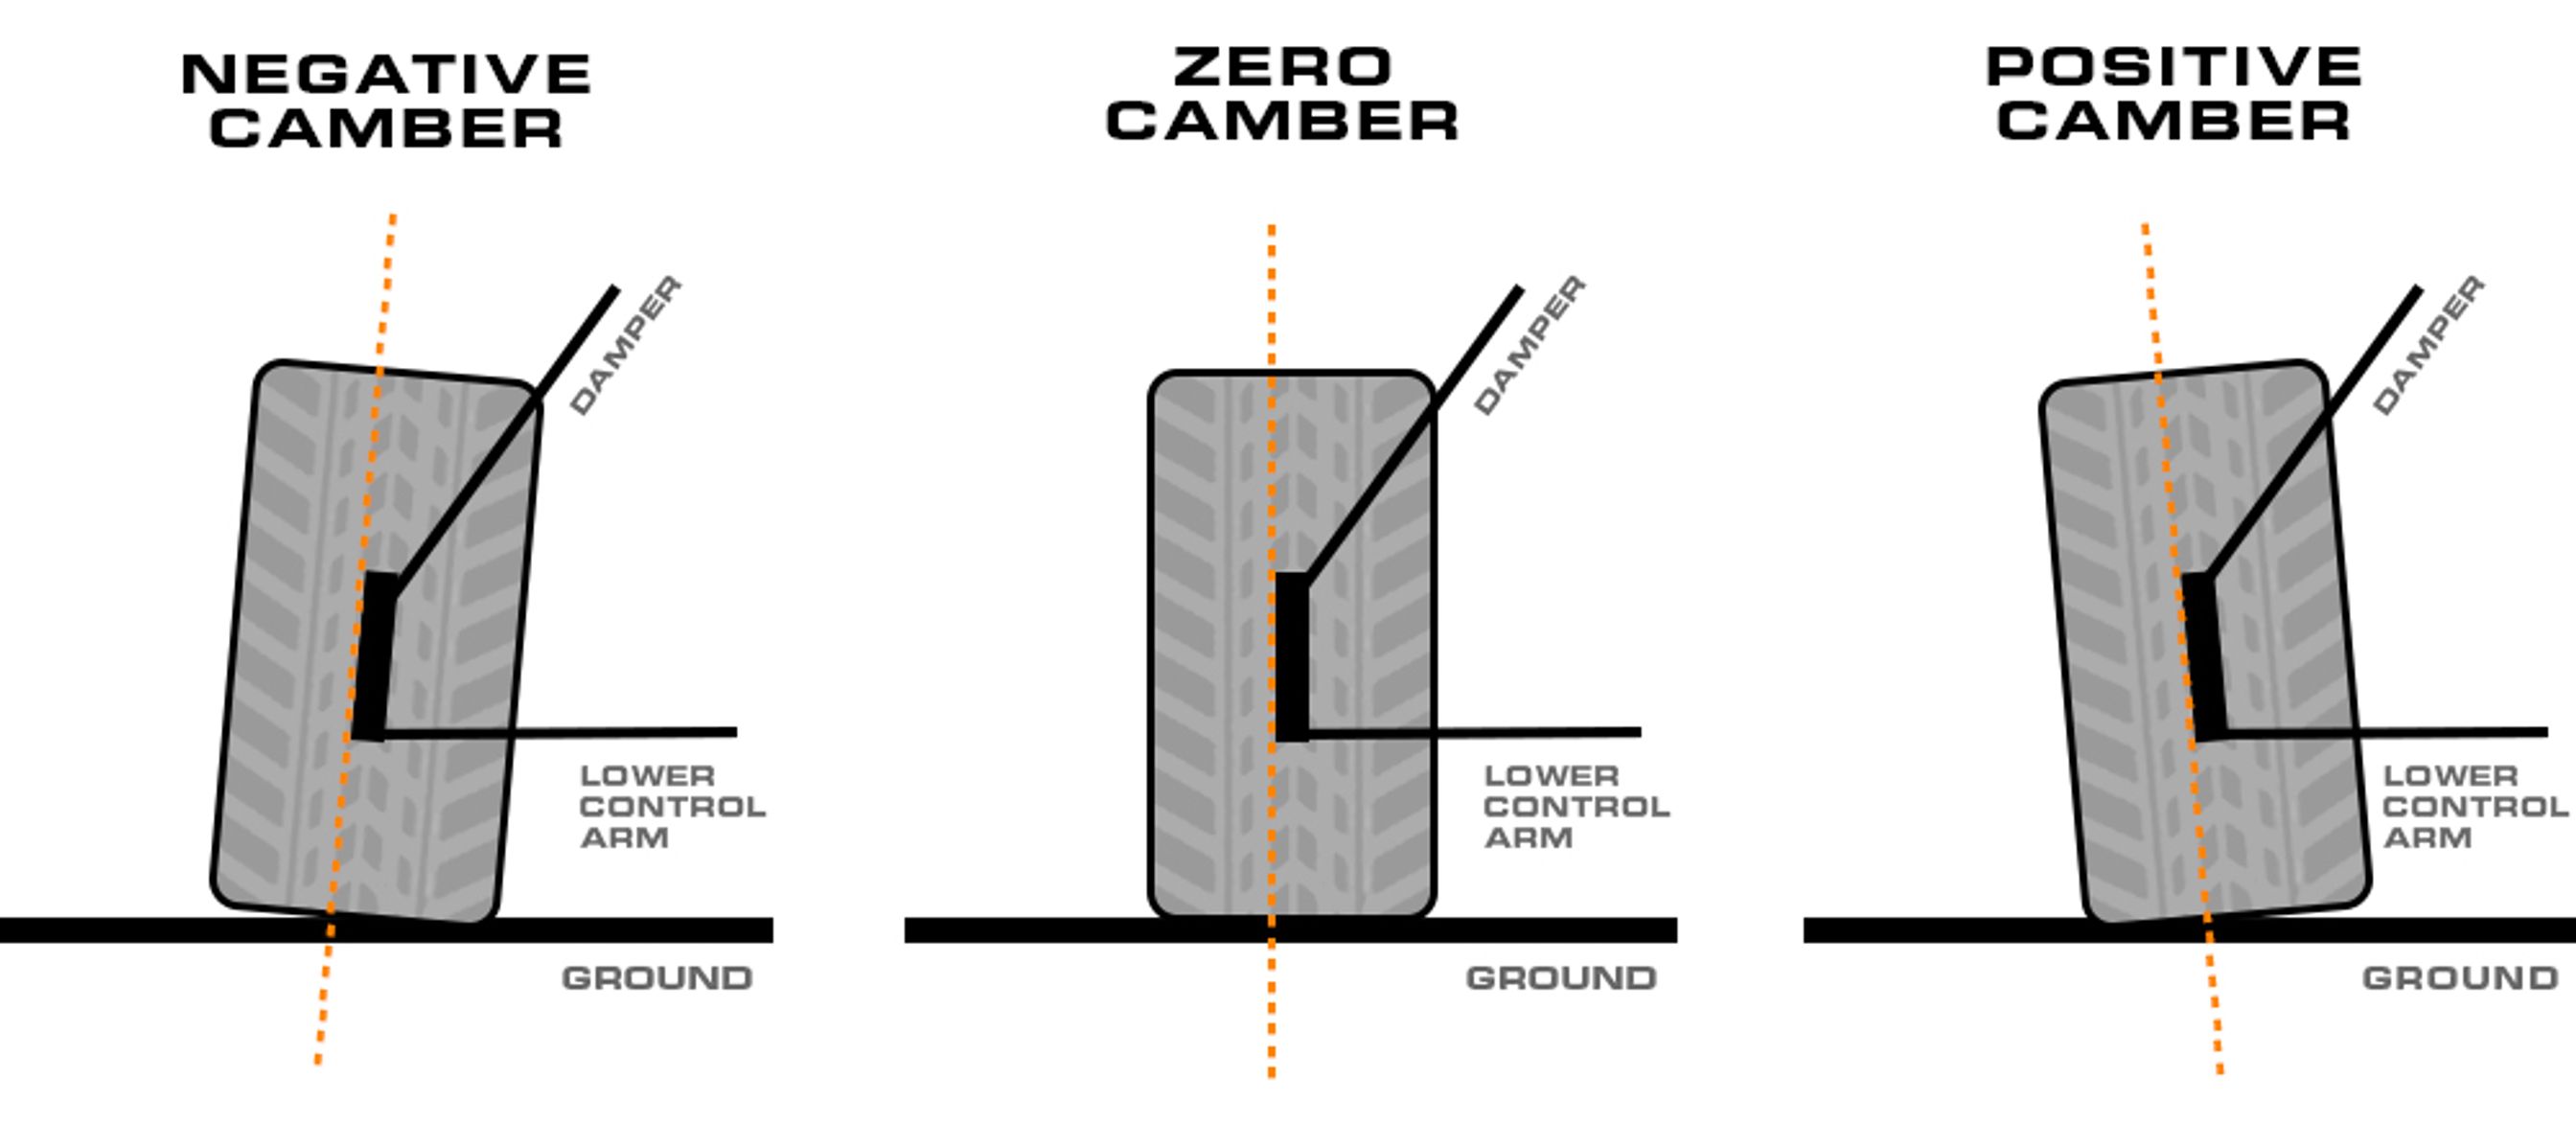
Knowing these terms helps you adjust the right parts with confidence.
Toe-In vs. Toe-Out
Toe-in means the front edges of your tires point slightly toward each other. Toe-out is the opposite, with fronts pointing away. Most golf carts perform best with a 1/8 to 1/4 inch toe-in, which improves straight-line stability and prevents steering darting.
Excess toe-in wears the outer edges of tires. Excess toe-out wears the inner edges. Both conditions shorten tire life significantly.
Camber Explained
Camber is the vertical tilt of your wheel when viewed from the front. Positive camber means the top leans outward. Negative camber means it leans inward. The ideal setting is zero, with the wheel standing perfectly upright. Excessive camber causes uneven tire wear and sloppy cornering.
Heim Joints and Tie Rods
Heim joints connect the steering knuckle to the spindle and control camber adjustments. Tie rods connect the left and right front wheels and control toe settings. Lengthening a tie rod increases toe-out. Shortening it increases toe-in.
Choose the Right Alignment Method
You don’t need a professional shop to get accurate results. Several DIY methods work well for most golf carts.
Tape Measure Method
This is the simplest and most accessible option.
- Face the front of your cart.
- Measure the distance between the inner edges of the front tires at the front.
- Roll the cart forward half a turn and measure the same inner edges at the rear.
- Compare readings. The front measurement should be 1/8 to 1/4 inch smaller than the rear for proper toe-in.
Pro Tip: Mark your measurement points with chalk for consistency between readings.
String Method
This method simulates professional laser alignment using basic supplies.
- Position your cart between two straight walls or secure jack stands.
- Run taut strings parallel to the cart on both sides, about one inch from the tires.
- Ensure strings are equidistant from the rear and front tires.
- Adjust until front tires sit closer to the string at the rear than at the front, confirming toe-in.
This approach works especially well for lifted carts and reveals even minor misalignment.
DIY Alignment Jig
A homemade jig made from PVC or metal rods can replicate expensive shop tools. Many YouTube tutorials show how to build one using L-shaped arms that attach to your wheel hubs.
- Takes about 90 minutes to build and use
- Reusable for future alignments
- Eliminates guesswork from toe measurements
Many users report their carts handle like new after using a jig.
Laser or Digital Tools
For frequent maintenance, consider investing in a laser alignment kit or digital gauge.
- Laser tools project reference lines onto targets for exact toe readings.
- Digital gauges attach to wheels and display angles in degrees or inches.
- Both methods typically take around 2 hours for a complete alignment.
One user noted their cart now tracks perfectly straight after switching to a laser system.
Step-by-Step Alignment Procedure
Follow these steps in order for a reliable, long-lasting result.
Step 1: Prepare the Cart
- Park on a level surface
- Center the steering wheel
- Inflate all tires to equal pressure
- Inspect suspension and steering joints for wear
Step 2: Measure Current Toe
Use the tape measure method to establish your baseline.
- Measure the front inside distance between front tires.
- Measure the rear inside distance at the same height.
- Calculate the difference.
If the front measurement is wider, you have toe-out. If narrower, you have toe-in. Your target is 1/8 to 1/4 inch toe-in.
Step 3: Adjust Camber First
Camber must be corrected before toe adjustment.
- Place a straight-edge vertically against the front tire.
- Look for gaps at the top or bottom.
- If the top touches but the bottom gaps, you have positive camber.
- Loosen the heim joint jam nuts on the affected side.
- Rotate the heim joint to tilt the wheel upright.
- Recheck with the straight-edge.
- Repeat on the opposite side.
Warning: Make small adjustments. Over-correction creates new alignment problems.
Step 4: Adjust the Tie Rods
Now set the correct toe.
- Jack up the front of the cart and support it with jack stands.
- Loosen the jam nuts on both tie rod ends.
- Turn each tie rod:
– Shorten (turn toward rear) → increases toe-in
– Lengthen (turn toward front) → increases toe-out - Adjust both sides equally to keep steering centered.
- Make small turns, then remeasure.
Step 5: Verify with a Roll Test
After adjustments:
- Lower the cart back to the ground.
- Roll it forward 7 to 10 feet to settle the suspension.
- Remake your toe measurements.
This step is critical. If readings change, readjust before driving.
Test Drive and Final Tweaks
Your alignment isn’t complete until the cart proves itself on the road.
Conduct a Test Ride
- Drive on a flat, straight path.
- Release the wheel slightly and note any pull to one side.
- Feel for vibration or wobble at moderate speed.
- Listen for tire scrubbing in turns.
If the cart drifts, return and recheck toe and camber. Even 1/16 inch off can cause noticeable pulling.
Make Final Adjustments
If the cart pulls left, slightly increase toe-in on the right side. Always adjust both sides to maintain symmetry. After finalizing, tighten all jam nuts securely without over-torquing.
When to Realign Your Cart
Alignment isn’t a one-time fix. Certain events require immediate attention.
After Impacts or Modifications
- Curb strikes
- Pothole hits
- Rough terrain encounters
- Lift kit installations
- Wheel or tire size changes
Any of these can knock your wheels out of spec.
Warning Signs to Watch
- Uneven tire wear on inner or outer edges
- Steering wheel sitting off-center
- Cart pulling to one side
- Vibration at speed
- Violent front-end shake (death wobble)
Warning: If you experience death wobble, stop driving immediately. This violent shaking can lead to a rollover, especially on lifted models.
Benefits of Proper Alignment
A correctly aligned cart delivers real, measurable advantages.
Saves Money
- Even tire wear extends tire lifespan
- Avoids replacing tires every few months
- Reduces strain on steering and suspension parts
Improves Safety
- Eliminates death wobble risk
- Reduces rollover potential
- Ensures predictable handling
Lifted carts are especially vulnerable to alignment-related dangers.
Enhances Ride Quality
- Steers straight with minimal effort
- Eliminates constant correction
- Delivers a smoother, quieter ride
- Improves fuel economy on gas models
DIY vs. Professional Alignment
Both options have merit depending on your needs.
DIY Advantages
- Low cost after initial tool investment
- Full control over the process
- Reusable tools for future alignments
- Personal satisfaction from doing it yourself
One user spent 90 minutes with a homemade jig and said the cart handles like new.
Professional Service
- Typical cost around $80
- Uses commercial-grade equipment
- Faster for one-time fixes
- Expert precision
One owner reported dramatically more responsive steering after a shop alignment.
Best Choice: If you modify your cart often, DIY pays off quickly. For occasional maintenance, a professional service once a year works well.
Common Mistakes to Avoid
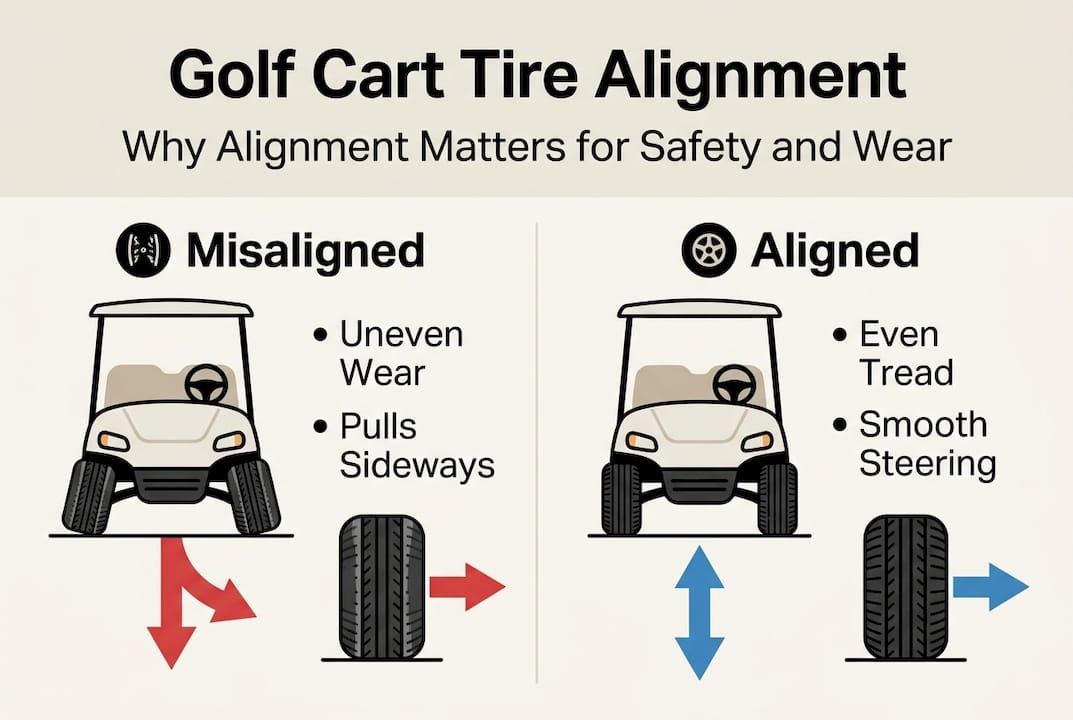
Even experienced owners make these errors.
Over-Tightening Tie Rods
One user over-tightened the jam nuts and ended up with wobbly steering, costing an extra hour to fix. Snug is enough; don’t crank them down.
Ignoring Tire Pressure
Aligning with uneven tire pressure gives false readings every time. Always equalize PSI before measuring.
Skipping the Roll-Forward Step
Failing to roll the cart 7 to 10 feet after adjustment leads to inaccurate results. Suspension needs time to settle into its new position.
Adjusting Only One Side
Always adjust both tie rods equally. Changing only one side misaligns the steering wheel and creates new problems.
Frequently Asked Questions About Golf Cart Alignment
What tools do I need to align a golf cart at home?
At minimum, you need a steel tape measure and a flat, level surface. For better accuracy, consider string, a straight-edge for camber, or a DIY jig from PVC pipe. Laser alignment kits and digital gauges offer the highest precision for frequent use.
How often should I align my golf cart?
Align your cart whenever you notice pulling, uneven tire wear, or after hitting obstacles like curbs or potholes. If you’ve installed a lift kit or changed tire sizes, realign immediately. Many owners check alignment once a year as preventive maintenance.
What is the ideal toe setting for a golf cart?
The ideal toe setting is 1/8 to 1/4 inch toe-in. This means the distance between the inner edges of your front tires should be 1/8 to 1/4 inch smaller at the front than at the rear. This slight inward angle improves straight-line stability.
Can bad alignment cause death wobble?
Yes. Death wobble, a violent front-end shake, is often triggered by misalignment combined with loose components like worn heim joints or tie rods. This is especially dangerous on lifted carts and can lead to rollovers. Address alignment and worn parts immediately if you experience this.
How long does a DIY golf cart alignment take?
Expect 90 minutes to 2 hours for most DIY methods. A tape measure and string approach takes longer due to multiple measurements and adjustments. A laser or digital tool typically cuts the time down and improves accuracy.
Is professional golf cart alignment worth the cost?
At around $80, professional alignment offers expert precision and commercial-grade equipment. For one-time fixes or if you’re unsure about DIY, it’s a solid investment. Regular DIYers save money long-term by purchasing reusable tools.
Key Takeaways for Aligning Your Golf Cart
Proper alignment protects your safety, your tires, and your wallet. Start with a level surface, even tire pressure, and a suspension inspection before measuring anything. Use the 1/8 to 1/4 inch toe-in specification as your target, and always adjust camber before toe.
Choose a method that matches your budget and skill level. The tape measure approach works for most owners, while laser tools suit frequent maintenance. Always perform the roll-forward verification and take a test drive before considering the job complete.
Your next step: Gather your tools, check your tire pressure, and measure your current toe setting tonight. You’ll know within minutes whether your cart needs adjustment.