You’ve charged your electric golf cart overnight. The batteries show full. You turn the key, press the accelerator, and nothing happens. No hum, no movement, not even a click. It’s a common and frustrating issue, especially when you’re ready to hit the course or navigate your community. The good news: an electric golf cart won’t move even with charged batteries is a problem you can often diagnose and repair yourself.
This guide walks you through a step-by-step diagnostic process to pinpoint why your cart isn’t responding. From loose connections to failed solenoids, we’ll help you identify the root cause quickly and safely. You don’t need to be a mechanic, but you do need a multimeter, basic tools, and about 30 to 60 minutes. Most problems stem from simple electrical faults, many of which you can repair yourself in under an hour.
Let’s get your cart rolling again.
Check Battery Connections First
Even fully charged batteries can’t deliver power if connections are compromised. This is the most common reason for a no-start condition.
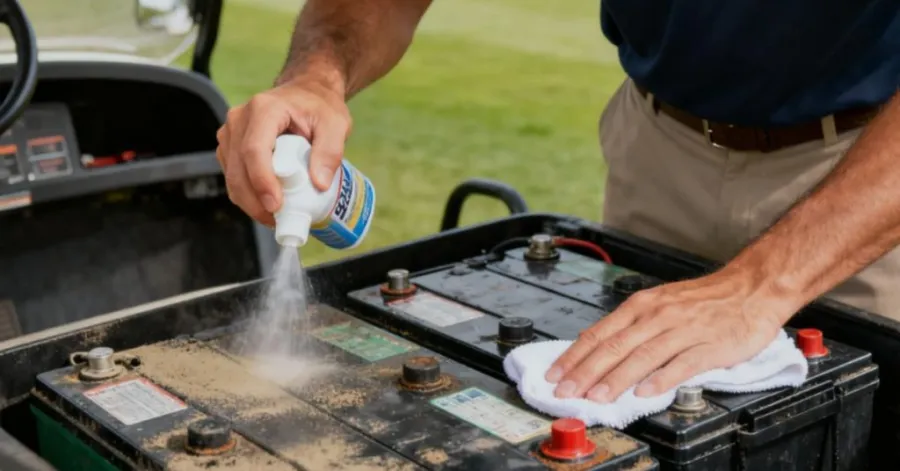
Clean Corroded Terminals
White or green crust on battery posts means corrosion. This buildup blocks current flow and prevents your cart from running.
Follow these steps to clean your terminals:
- Disconnect the negative cable first, then the positive
- Mix baking soda with water and scrub terminals with a wire brush
- Rinse with clean water and dry completely
- Reconnect cables, positive first, then negative, and tighten securely
Pro tip: Apply dielectric grease after cleaning to prevent future corrosion.
Inspect Cable Tightness
Loose cables cause intermittent power loss and can mimic a dead battery.
- Wiggle each connection. No movement should occur.
- Look for cracked or frayed wires near clamps.
- Replace any cable showing signs of wear.
Warning: Loose connections can overheat and damage batteries or controllers.
Inspect the Wiring Harness
Damaged wiring cuts off power between components. A visual check takes minutes but prevents costly misdiagnoses.
Look for Frayed or Pinched Wires
Focus on high-stress areas where wires flex or rub:
- Near battery trays
- Around the motor and controller
- Under the seat where wires bend
Check for exposed copper, melted insulation, or wires rubbing against metal. Secure loose bundles with zip ties and repair damaged sections with heat-shrink connectors.
Test Connector Seals
Moisture in connectors causes shorts and erratic behavior.
- Unplug and inspect all connectors, especially near the solenoid and controller
- Dry damp ones with compressed air
- Spray with electrical contact cleaner before reconnecting
Test Battery Voltage Accurately
A full charge reading on a meter doesn’t guarantee healthy batteries. One weak cell can kill performance across the entire pack.
Measure Individual Battery Voltage
Use a digital multimeter to check each battery:
- Set the meter to DC volts
- Touch the red probe to the positive terminal and black to the negative
- Record each battery’s voltage
Healthy readings are:
- 8V battery: 7.8 to 8.4V
- 6V battery: 6.3 to 6.6V
- 12V battery: 12.6 to 12.8V
Replace any battery more than 0.5V below the rest.
Check Total Pack Voltage
Test across the entire series to confirm the pack is healthy:
- Red probe on the first battery’s positive terminal
- Black probe on the last battery’s negative terminal
For a 48V system, expect 47 to 50V. Below 45V means one or more cells may be failing under load, even if individual voltages looked okay.
Expert note: A weak or failed cell in one battery can cause the entire system to fail, even if the rest are charged.
Diagnose the Solenoid with a Click Test
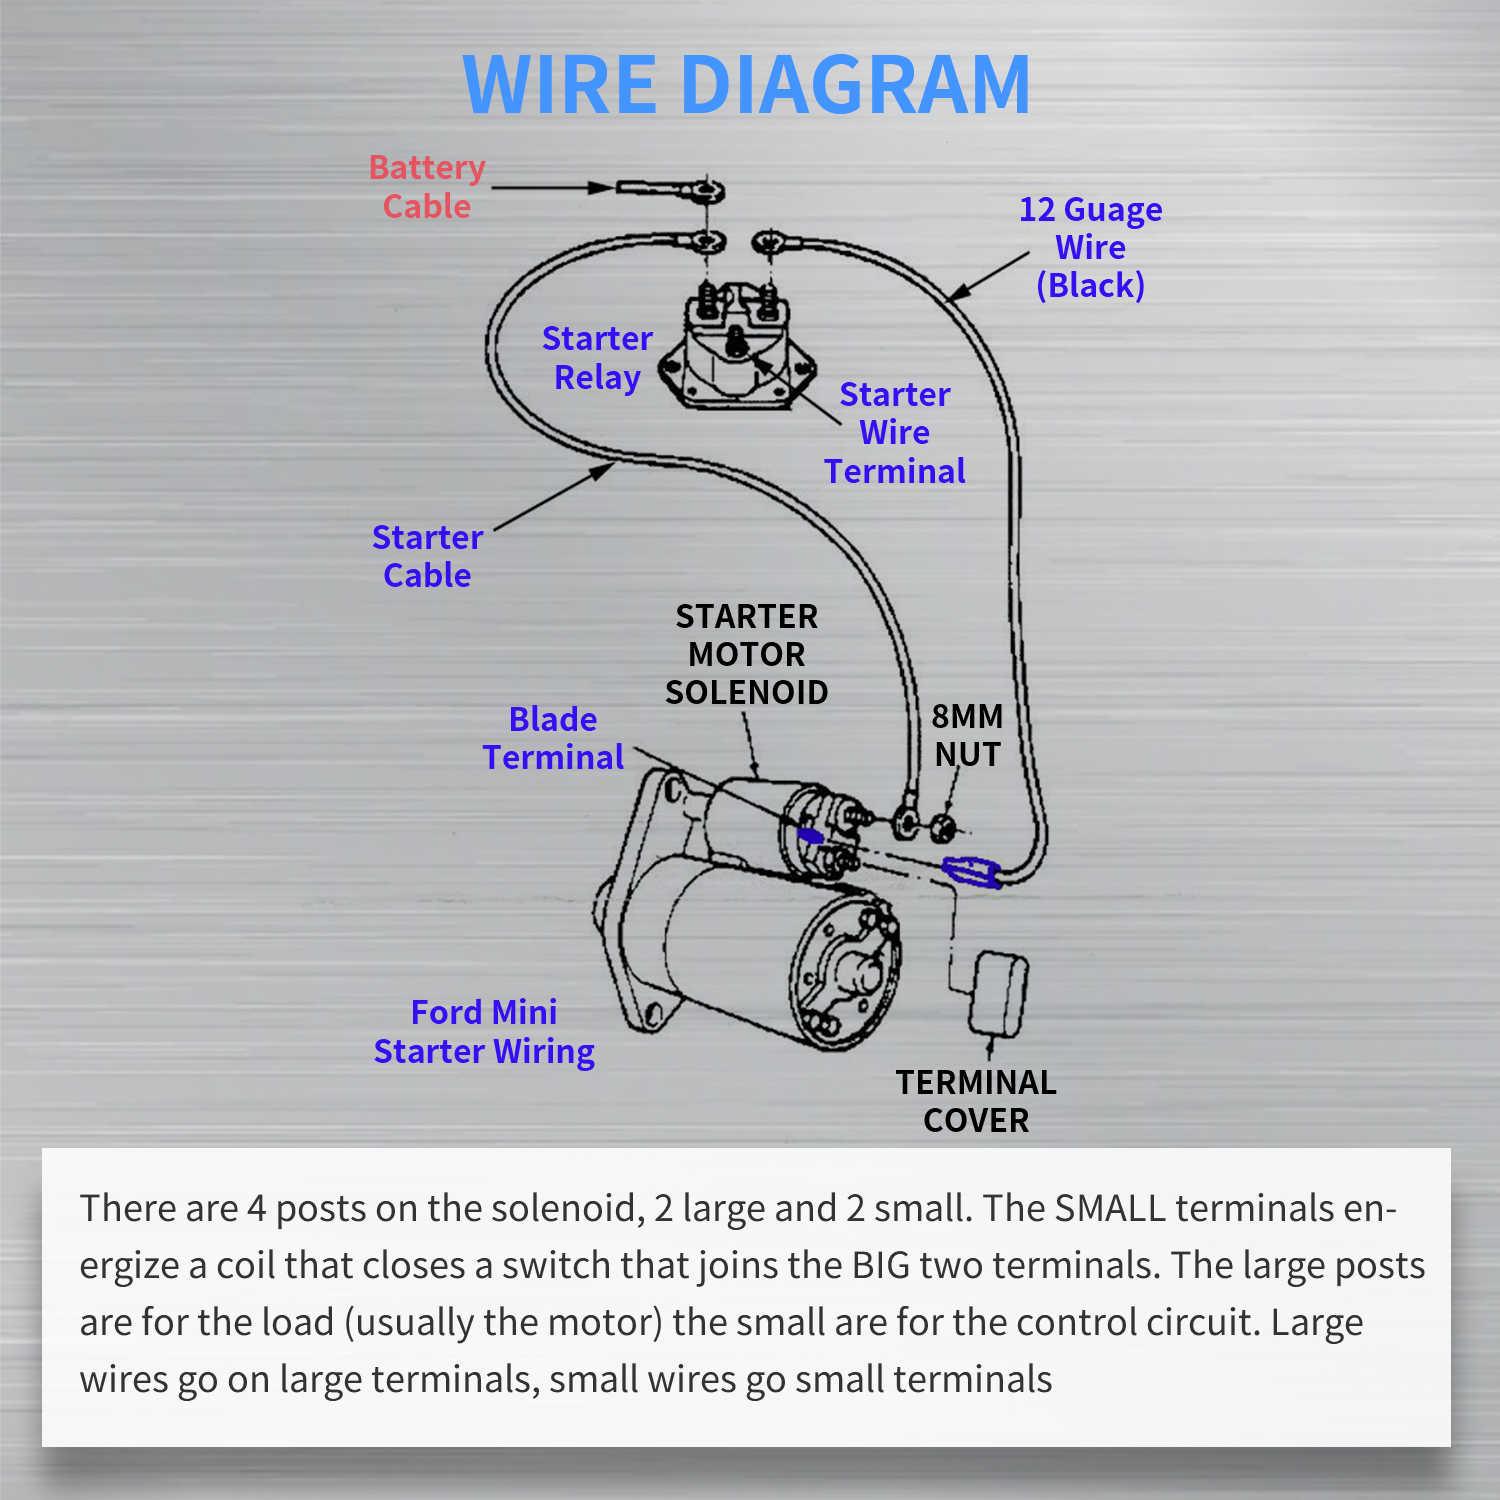
The solenoid is the main power gate. If it fails, no electricity reaches the motor, even with perfect batteries.
Listen for the Click
Turn the key and press the accelerator slightly. You should hear a distinct click from the solenoid, usually located near the batteries or controller.
- No click at all points to a solenoid, switch, or wiring issue.
- Click but no movement means the problem lies downstream, likely in the motor or controller.
Test Solenoid Continuity
With the key off, follow these steps:
- Disconnect the small control wires from the solenoid
- Set the multimeter to ohms
- Place probes on the two small terminals
A normal reading falls between 60 and 100 ohms. No continuity means the solenoid coil is dead and needs replacement.
Bypass the Solenoid (With Caution)
Only do this if you’re experienced with electrical systems:
- Use a screwdriver to briefly touch both large terminals
- If the motor runs, power is flowing and the solenoid is faulty
- If nothing happens, the issue is beyond the solenoid
Warning: This creates a spark. Do not attempt near leaking batteries or fuel.
Inspect Key and Direction Switches
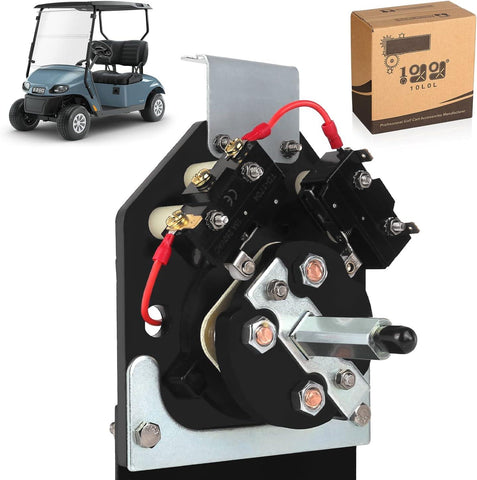
These switches activate the solenoid. If they fail, the system never gets the “go” signal.
Test the Key Switch
With the multimeter in continuity mode:
- Turn the key to “ON”
- Check for continuity between battery and output wires
No continuity means the switch needs replacement.
Diagnose the Forward/Reverse Switch
This switch often fails due to moisture or wear.
- Set the cart to neutral, then switch to forward
- Listen for a click and repeat in reverse
No click? Open the switch if accessible and check for burnt contacts, loose wires, or a stuck lever. Clean internal contacts with electrical contact cleaner and replace if damaged.
Pro tip: The absence of a reverse beep often points to a faulty F/R switch, its wiring, or the controller.
Test the Motor Directly
If power reaches the solenoid but the cart won’t move, the motor may be the culprit.
Apply Direct Power (Advanced Users Only)
Only attempt this if you understand DC circuits:
- Disconnect motor leads from the controller
- Use jumper cables to apply 48V directly from the battery pack
- Connect positive to motor terminal A1 and negative to A2
If the motor spins, the controller is likely bad. If it doesn’t spin, the motor may have failed windings or brushes.
Warning: Do not exceed 5 seconds. Overheating can destroy the motor.
Check Motor Resistance
Set the multimeter to ohms and test between A1 and A2 terminals. Expect very low resistance near 0 ohms. Infinite resistance indicates an open circuit, meaning the motor needs repair.
Evaluate the Controller

The controller is the brain of your cart. It sends power from the battery to the motor based on pedal input.
Look for Obvious Damage
Remove the controller cover if it’s accessible. Check for a burnt smell, discolored or bulging components, or corrosion on the circuit board. Any of these signs mean you should replace the controller.
Check Error Codes (If Equipped)
Some EZGO, Club Car, or Yamaha carts flash lights to indicate faults:
- 3 blinks often indicate a pedal fault
- 5 blinks often indicate a controller error
Refer to your model’s manual for specific code meanings.
Test Throttle Signal
Use the multimeter in DC volts and probe the throttle signal wire (usually white or yellow) and ground. Press the accelerator slowly. Voltage should rise smoothly from 0V to roughly 5V. Jumps or flatlines mean you need to replace the potentiometer or pedal.
Address Common Hidden Issues
Sometimes the problem isn’t in the main components. It’s in overlooked safety or auxiliary systems.
Check the OBC (On-Board Computer)
In newer carts, the OBC manages power delivery. Ensure it’s receiving power by testing input voltage, look for blinking status lights, and try resetting it by disconnecting the battery for 10 minutes.
Inspect the Brake Interlock Switch
Some carts won’t move if the brake is engaged, even slightly. Locate the switch near the brake pedal, bypass it temporarily to test movement, and replace if faulty.
Verify the Tow/Run Switch
If accidentally set to “Tow,” the controller is disabled. Switch to “Run” and retry. Clean contacts if the switch feels stiff.
Prevent Future No-Move Failures
Once you fix the issue, take steps to avoid repeat breakdowns.
Perform Monthly Connection Checks
- Tighten all battery and cable connections
- Clean terminals every 3 months
- Inspect wiring for wear
Turn Off the Key After Use
Leaving the key on drains batteries and can trip safety locks. Always switch to “Off” and remove the key when finished.
Store with Full Charge
Never store batteries low. Recharge after every use, even short ones. For long storage, charge monthly to maintain battery health.
Upgrade to Quality Parts
Replace worn cables with marine-grade wire, use OEM or high-rated solenoids and controllers, and avoid cheap aftermarket batteries that fail early and unevenly.
Frequently Asked Questions About Electric Golf Carts Not Moving
Why does my electric golf cart not move even with fully charged batteries?
Loose or corroded battery connections are the most common cause. Even with full batteries, poor terminal contact blocks current flow. Check and clean all connections before assuming the batteries are the problem.
How do I know if my solenoid is bad?
Listen for a click when you press the accelerator. No click usually means the solenoid coil has failed. You can also test continuity with a multimeter. A normal reading falls between 60 and 100 ohms.
Can a bad key switch prevent my golf cart from moving?
Yes. The key switch sends the signal to activate the solenoid. If it has no continuity when turned to “ON,” power never reaches the motor and the cart won’t move.
What does it mean if my motor clicks but doesn’t spin?
A clicking sound without movement often points to a failed solenoid, a bad controller, or low voltage reaching the motor. Test each component in sequence to isolate the issue.
How do I reset my electric golf cart?
Disconnect the main battery pack for about 10 minutes, then reconnect. This resets the on-board computer and clears some error states in newer models.
Should I leave my golf cart key on overnight?
No. Leaving the key on drains batteries and can trigger system faults. Always turn the key to “Off” and remove it when the cart is not in use.
Key Takeaways for Diagnosing an Electric Golf Cart That Won’t Move
Most no-move issues trace back to three main culprits: battery connections, the solenoid, or switch failures. Start with the simplest checks, like cleaning terminals and listening for the solenoid click, before moving to advanced motor and controller tests. Having a multimeter on hand makes diagnosis faster and more accurate.
If you’ve completed all the tests and your cart still won’t run, consult a certified technician for controller or motor rebuild options. Keep this guide bookmarked so you’re ready the next time your cart refuses to roll.