

Is your golf cart sitting idle because the battery charger won’t turn on or refuses to charge? You are not alone, as golf cart owners frequently face charger issues ranging from faulty wiring to blown fuses and failed circuit boards. The good news is that many common golf cart battery charger problems can be diagnosed and repaired at home with basic tools and a methodical approach. This guide walks you through step-by-step troubleshooting, repair techniques, and clear indicators for when replacement makes more sense.
Essential Safety Precautions Before Golf Cart Battery Charger Repair
Before opening any charger or testing components, safety must come first. Golf cart chargers operate on high-voltage AC input and store dangerous energy levels even when unplugged.
Disconnect Power Completely
Always unplug the charger from the wall and disconnect it from the golf cart batteries. Wait at least 10 minutes before handling internal components to allow capacitors to discharge.
Wear Protective Gear
Use insulated gloves and safety glasses. Avoid working on damp surfaces or with wet hands. Treat all wires as live until proven otherwise with a multimeter.
Work in a Dry, Ventilated Area
Moisture increases shock risk. Ensure your workspace is dry and well-lit. Keep children and pets away during testing and repair.
Identify Your Charger Type and Specifications
Knowing your charger’s specifications is critical for accurate diagnosis and safe golf cart battery charger repair.
Check Manufacturer and Model Number
Locate the label on the charger housing. Note the brand, model number, input voltage (110V or 220V), and output specs (such as 48V, 15A). This information helps determine compatible parts and repair procedures.
Determine Charger Technology
Most modern golf cart chargers are switch-mode power supplies (SMPS). Older models may use transformer-based designs. SMPS units are lighter but more sensitive to voltage spikes and overheating.
Confirm Battery Compatibility
Ensure the charger matches your battery bank voltage (36V, 48V, or 72V) and chemistry (flooded lead-acid, AGM, or lithium). Mismatched chargers cause undercharging or overcharging.
Perform a Visual Inspection of the Charger
A quick visual check can reveal obvious signs of damage without any tools, making it a smart first step in golf cart battery charger repair.
Examine the Exterior Housing
Look for cracks, burn marks, or melted plastic on the case. Swelling or discoloration often indicates internal overheating or component failure.
Inspect Power Cord and Plug
Check for frayed wires, bent prongs, or loose connections. A damaged cord can interrupt power delivery and create fire hazards.
Open the Case Carefully
Use a screwdriver to remove the casing. Some models have tamper-proof screws, so use the correct bit. Avoid forcing the cover, which may break internal tabs.
Look for Burnt Components
Inside, scan for charred circuit boards, bulging capacitors, or broken solder joints. A burnt smell is a strong indicator of failed electronics.
Test Input Power and Fuse
Start diagnostics at the power entry point to confirm if electricity reaches the charger.
Verify Wall Outlet Function
Plug in another device (like a lamp) to ensure the outlet is live. Use a voltage tester to confirm 110V AC (or 220V, depending on your model).
Locate and Test the Fuse
Most chargers have an internal fuse near the AC input. Remove it carefully and test with a multimeter on continuity mode. A blown fuse reads “OL” or produces no beep.
Replace Fuse Only If Safe
If the fuse is blown, replace it with the same type and rating (such as 10A slow-blow). Plug in the charger. If the new fuse blows immediately, there is a short circuit downstream.
Diagnose No-Power Symptoms
When the charger shows no lights or response, the issue likely lies in power input or primary circuitry.
No Lights When Plugged In
This typically points to a failed fuse, damaged power switch, or broken AC input circuit. Confirm power reaches the board using a multimeter.
Intermittent Power Issues
Loose wiring or cracked solder joints can cause flickering or random shutdowns. Gently wiggle wires while monitoring for connection loss.
Humming or Buzzing Noise
A loud hum may indicate a failing transformer or shorted capacitor. Turn off the charger immediately and inspect the primary side components.
Check Output Voltage and Charging Performance
Once input power is confirmed, test whether the charger delivers correct DC output.
Set Multimeter to DC Voltage
Connect the charger to the wall but not to batteries. Set your multimeter to measure DC voltage (200V range). Identify output terminals (usually labeled + and -).
Measure Open-Circuit Voltage
With no load, a healthy 48V charger should output between 50V and 58V. Significantly lower or zero voltage indicates regulator or control board failure.
Compare to Rated Output
Match your reading to the label specs. If output is unstable or absent, the switching circuit or MOSFETs may be damaged.
Inspect Internal Components

Dive deeper into the circuit to isolate failed parts.
Test Capacitors for Bulging or Leakage
Electrolytic capacitors degrade over time. Look for domed tops, leaks, or crusty residue. Use an ESR meter or capacitance mode to test values and replace any out of tolerance.
Examine MOSFETs and Diodes
Use the multimeter diode test function. A shorted MOSFET or rectifier diode will show near-zero resistance in both directions. Replace faulty semiconductors with exact matches.
Check Transformer and Inductors
Look for burnt insulation or open windings. Test continuity across primary and secondary coils. An open circuit means replacement is needed.
Clean and Re-Secure All Connections
Dirt, corrosion, and vibration can disrupt electrical flow.
Remove Dust and Debris
Use compressed air to blow out dust from circuit boards and cooling fins. Avoid touching components with metal nozzles.
Clean Corroded Terminals
Apply electrical contact cleaner to battery and AC terminals. Scrub gently with a toothbrush if needed. Dry thoroughly before reassembly.
Tighten Loose Screws and Wires
Vibration loosens connections over time. Secure terminal blocks, ground wires, and mounting screws. Re-solder any cracked joints.
Reset and Recalibrate the Charger
Some chargers have resettable protection circuits or need recalibration after repair.
Locate Reset Button or Procedure
Certain models include a reset button or require a specific plug-in sequence. Consult the manual if available.
Allow Full Charge Cycle
After repair, connect to batteries and let the charger run through a complete cycle. Monitor for abnormal heat or noise.
Verify LED Indicators
Check that status lights follow expected patterns, such as red during charge and green when full. Erratic blinking suggests control board issues.
Know When to Replace Instead of Repair
Not all chargers are worth repairing, since some failures require costly parts or specialized skills.
Age and Obsolescence
Chargers over 8 to 10 years old may lack replacement parts. Upgrading to a modern, efficient model can improve charging speed and battery life.
Cost vs. Repair Value
If replacement components exceed $50 and require technical labor, a new charger may be more economical. New units start around $150 and include warranties.
Safety-Critical Failures
If the main control board is fried, or the isolation between AC and DC sides is compromised, replacement is safer than attempting golf cart battery charger repair.
Purchase a Reliable Replacement Charger
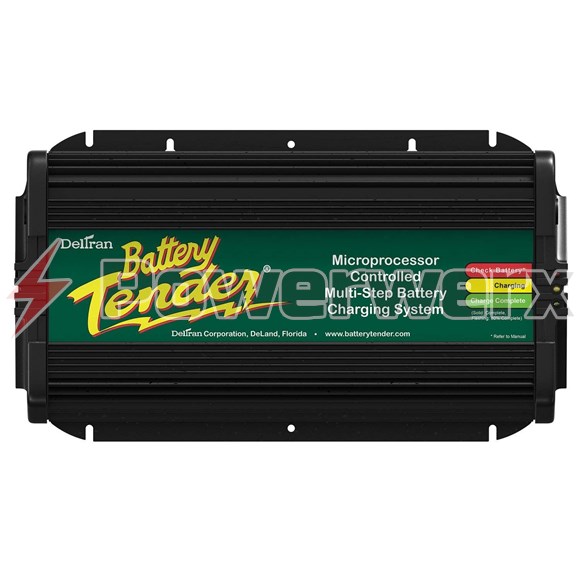
When repair isn’t feasible, choose a high-quality replacement charger.
Match Voltage and Amperage
Ensure the new charger matches your battery bank’s voltage and recommended charge rate. Undersized chargers prolong charge time while oversized ones risk battery damage.
Choose Reputable Brands
Opt for trusted manufacturers like Curtis, Zivan, or Battery Tender. Avoid no-name brands with poor reviews or missing safety certifications.
Look for Smart Charging Features
Modern chargers offer multi-stage charging (bulk, absorption, float), temperature compensation, and auto-shutoff, all of which protect your battery investment.
Prevent Future Charger Issues
Extend your charger’s lifespan with simple maintenance habits.
Store in a Dry, Cool Place
Heat and moisture accelerate component degradation. Avoid leaving the charger in direct sun or damp garages.
Unplug After Charging
Continuous connection stresses internal circuits. Unplug both from the wall and the cart when not in use.
Perform Quarterly Inspections
Check cords, plugs, and vents every few months. Early detection of wear prevents sudden failures.
Frequently Asked Questions About Golf Cart Battery Charger Repair
What is the most common reason a golf cart battery charger stops working?
The most common causes are a blown fuse, damaged power cord, or failed internal components like capacitors or MOSFETs. Start your diagnosis by checking the fuse and input power.
Can I repair a golf cart battery charger myself?
Yes, many common issues can be fixed at home if you have a multimeter, basic soldering skills, and comfort working with high-voltage circuits. However, safety precautions are essential.
How much does it cost to repair a golf cart battery charger?
DIY repairs typically cost between $10 and $50 for replacement parts like fuses, capacitors, or diodes. Professional repairs can range from $100 to $300 depending on the issue.
How do I know if my charger is bad or my batteries are bad?
Test the charger’s open-circuit voltage with a multimeter. A healthy 48V charger should output between 50V and 58V. If voltage is correct but batteries won’t hold a charge, the batteries are likely the problem.
Is it worth repairing an old golf cart charger?
If the charger is over 8 to 10 years old and replacement parts are hard to find, purchasing a new unit is often more cost-effective and safer than attempting a repair.
How long should a golf cart battery charger last?
With proper care and maintenance, a quality golf cart charger typically lasts 8 to 10 years before requiring replacement.
Final Thoughts on Golf Cart Battery Charger Repair
Golf cart battery charger repair is often achievable with careful testing and component replacement when you follow a systematic approach. Focus on safety first, use a multimeter to trace faults methodically, and recognize when replacement makes more sense than repair. Start by checking the fuse and input power, then work your way through the circuit to identify failed components. With the right tools and patience, you can restore reliable charging to your golf cart and avoid unnecessary replacement costs.
